Post by retiredbri on Nov 25, 2008 13:40:56 GMT 1
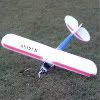
I've done the first part of converting the Cub - Dx6i/Ar6200, two off HS55 servos plus Castle Creations Pixie 20 brushed ESC/BEC. I'm staying with 480 brushed motor and NiMH batteries till much I've got a good number of hours in with the new Tx.
It went very well after a cautions start - read the books 5 times and tried it out on a brassboard (UK called a Breadboard).
Here is the picture:
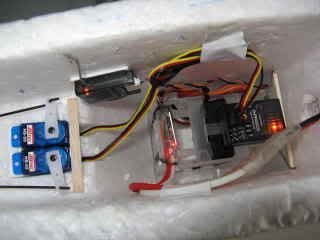
The LEDs show both Receivers bound and the ESC armed.
My old "beaten up and repaired" Cub had flown over 29 hours and 350 flights - mostly on a farmer's rough field.
The weight was 590 grms (19.8 oz) without battery. After changes, the weight dropped to 560 grms (18.7 oz). This was a lot but when I weighed the old HZ electrics, it made sense.
The saving means I can fit larger wheels (David Brown lite-flight 2 1/4 inch) and be back to the same weight as before.
I also checked the Centre of Gravity before converting - mine was 2.46inch behind the wing front edge. The absolute figure didn't worry me because the plane flew well. I did the check with and without the batteries - it moved less than 1/16 inch forward with the batteries - good design HZ!
After the changes, the CofG was less than 1/16inch forward. Not unreasonable since I had taken out electronics from on top of the battery box and put the new ones in the same place and used new servos a total of 10 grm (<0.5oz) lighter then the old ones.
The pictures below show how I checked the CofG. It used an idea I saw on Nebraska Flyer's very good videos on You-tube - the link from the UK is: uk.youtube.com/profile_videos?user=NeCubFlyer
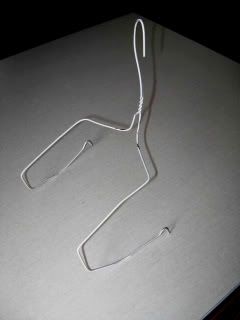
C of G jig - a bent wire coat hanger
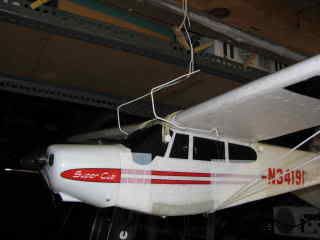
Hanging up balanced in the garage - this allows me to get under it. CAUTION: in this position, do not knock the plane else it will fall!
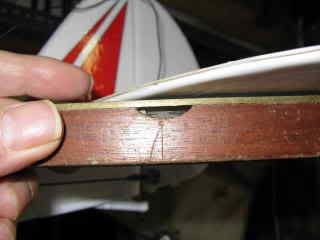
The Tail had to be horizontal - check with a spirit level
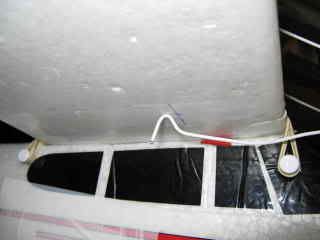
The large mark is my reference point and is the thickest part of the wing. The balance point is behind this mark.
This will be useful when I get a new wing to do the aileron mods.
Regards
retiredbri
It went very well after a cautions start - read the books 5 times and tried it out on a brassboard (UK called a Breadboard).
Here is the picture:

The LEDs show both Receivers bound and the ESC armed.
My old "beaten up and repaired" Cub had flown over 29 hours and 350 flights - mostly on a farmer's rough field.
The weight was 590 grms (19.8 oz) without battery. After changes, the weight dropped to 560 grms (18.7 oz). This was a lot but when I weighed the old HZ electrics, it made sense.
The saving means I can fit larger wheels (David Brown lite-flight 2 1/4 inch) and be back to the same weight as before.
I also checked the Centre of Gravity before converting - mine was 2.46inch behind the wing front edge. The absolute figure didn't worry me because the plane flew well. I did the check with and without the batteries - it moved less than 1/16 inch forward with the batteries - good design HZ!
After the changes, the CofG was less than 1/16inch forward. Not unreasonable since I had taken out electronics from on top of the battery box and put the new ones in the same place and used new servos a total of 10 grm (<0.5oz) lighter then the old ones.
The pictures below show how I checked the CofG. It used an idea I saw on Nebraska Flyer's very good videos on You-tube - the link from the UK is: uk.youtube.com/profile_videos?user=NeCubFlyer

C of G jig - a bent wire coat hanger

Hanging up balanced in the garage - this allows me to get under it. CAUTION: in this position, do not knock the plane else it will fall!

The Tail had to be horizontal - check with a spirit level

The large mark is my reference point and is the thickest part of the wing. The balance point is behind this mark.
This will be useful when I get a new wing to do the aileron mods.
Regards
retiredbri


