Post by Britpilot on Feb 3, 2010 2:47:20 GMT 1
This is Part 3. Rigid Carbon Fibre wing struts.
Part 1 can be found here: supercubclub.proboards.com/index.cgi?board=tt&action=display&thread=2796
Part 2 can be found here: supercubclub.proboards.com/index.cgi?board=tt&action=display&thread=2793
It took me quite a while to figure out how I was going to fit rigid Carbon Fibre wing struts on my SCLP. In the end it turned out to be quite a fiddly job involving a lot of intricate metalwork. Not for the faint hearted this mod if you want to copy it!
I decided to use 3.2mm diameter carbon fibre rod for the struts. That was the easy part, working out how to fasten the rods to the wing and fuselage was the hard part! After a few experiments this is how I finally did it.
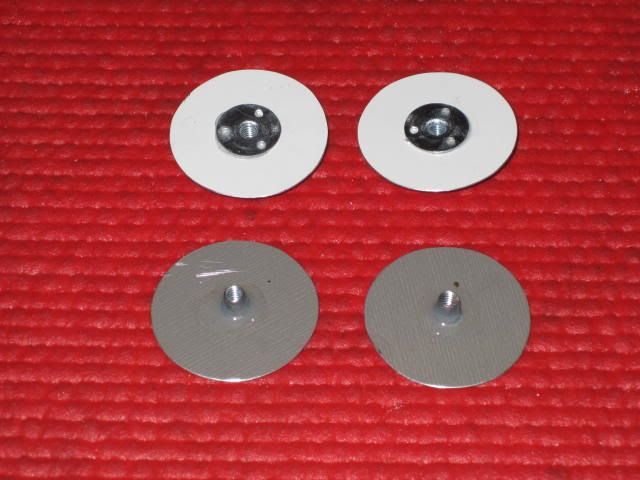
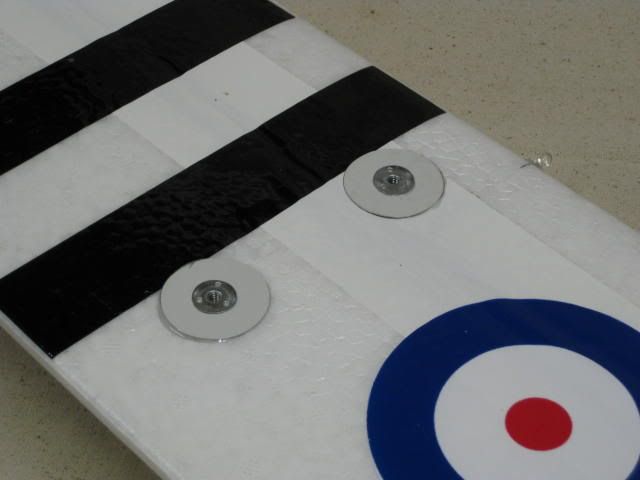
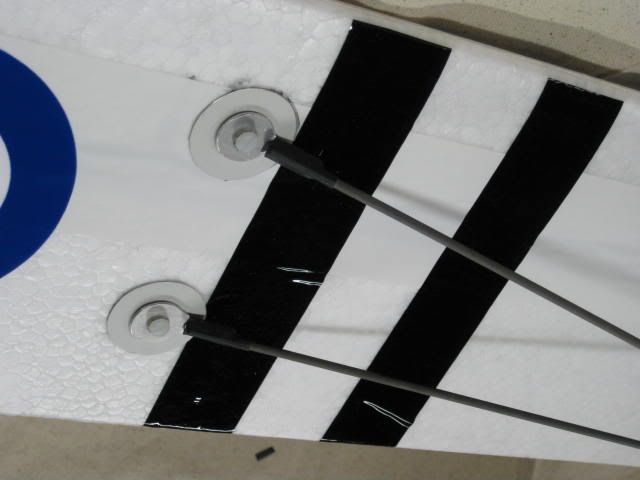
To mount the struts to the wing I made up some mounting plates with threaded inserts. I used # 6 “T nuts” from my local hardware store for the threaded inserts (The “brad” type T-nuts with holes and not the hammer home type with spikes). I epoxied these T-nuts into 35mm diameter plates made out of white gutter alluminium. After removing the stock strut mounts from the wing I epoxied the new threaded inserts into the wing.
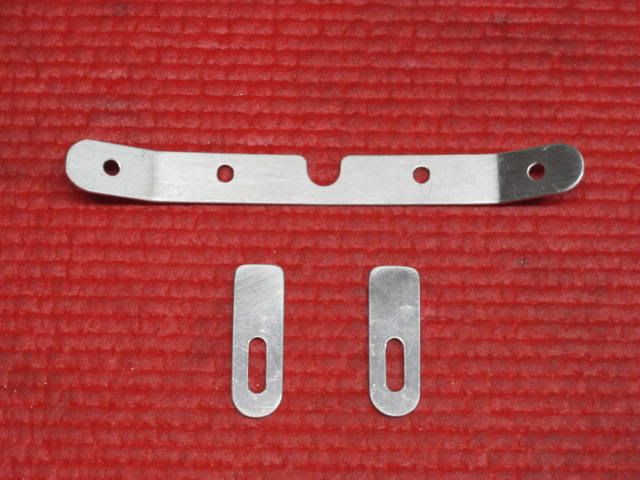
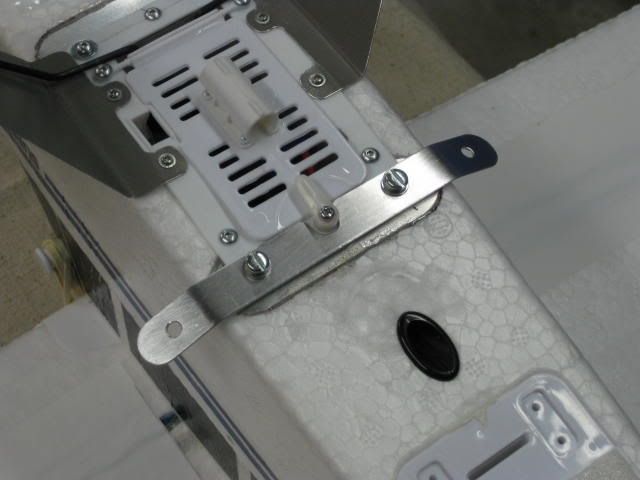
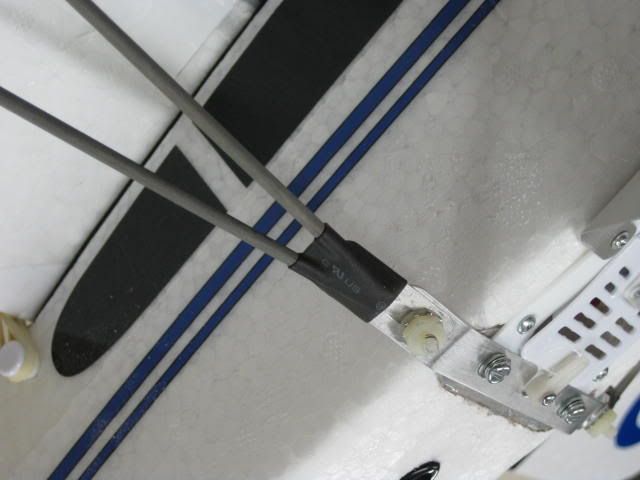
As part of my previous battery box strengthening mod (See post : supercubclub.proboards.com/index.cgi?board=tt&action=display&thread=2699) I had installed #10 “rivnuts” on the fuselage for the struts to fasten to and I made a bracket out of 2mm alluminium sheet to fit on to these. I also made the lower strut mounts out the same alluminium and cut elongated holes for # 8 bolts in them for strut length adjustment.
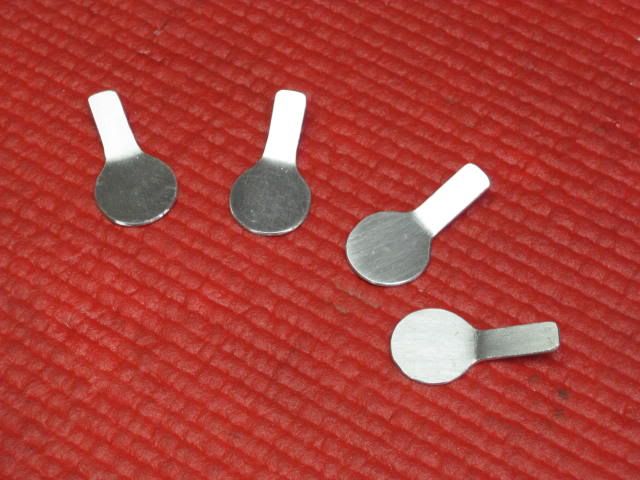
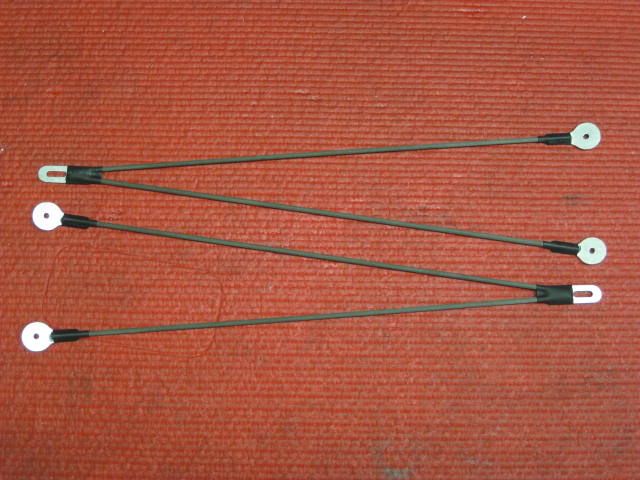
Next I cut out of 2mm alluminium four plates to mount the struts to the wing. I made these plates 20mm diameter with a “tab” to fix the strut to. After I had finished these plates and bent the “tab” to the strut angle I epoxied a carbon fibre rod onto each one.
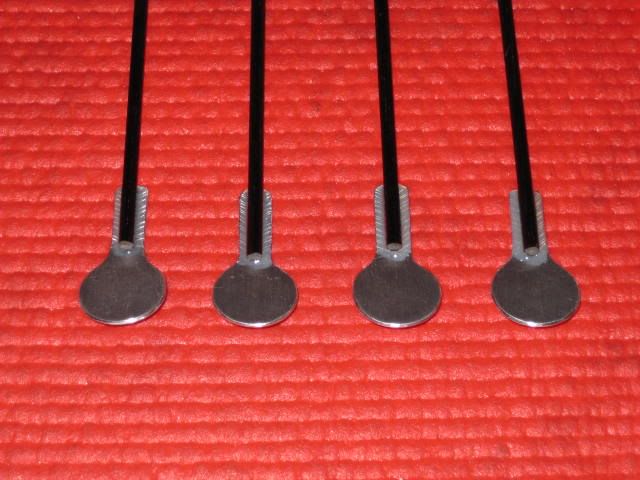
After drilling a hole for a #6 machine screw in the centre of each plate I screwed them to the wing, marked and cut the CF strut rods to length and epoxied them to the fuselage mounting plate. I did this with the wing installed on the aeroplane to get all the angles correct. (Another fiddly job this getting the dihedral angles and strut angles equal side to side) To tidy up the finished struts I placed heat shrink tubing over the epoxied strut to plate bonds.
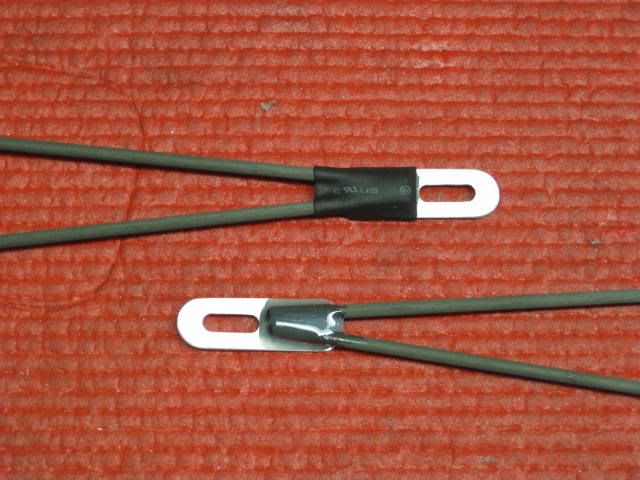
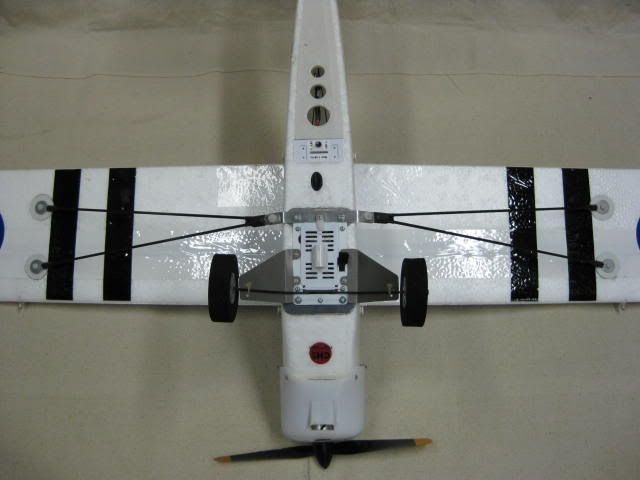
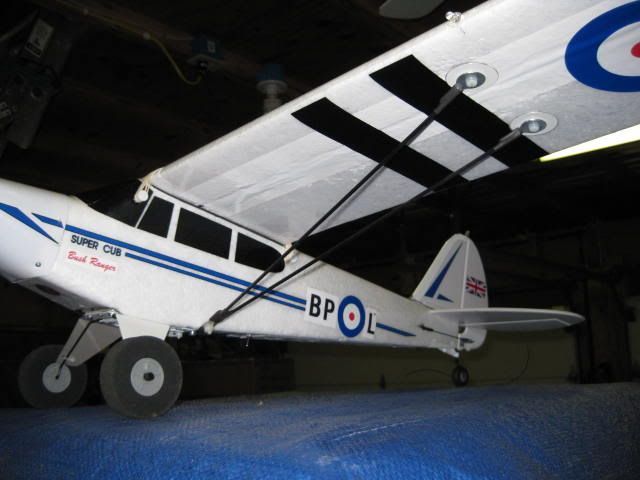
I chose to use nylon machine screws and nuts to with shake proof washers to fasten the struts to the aircraft and wing as I wanted the bolts and screws to be the weakest link. My thinking here was that hopefully in the event of a major prang the nylon screws will break alleviating to much damage to the wing and fuselage. At least that’s the idea! For the wing mounts I used #6 nylon machine screws and #8 nylon machine screws and nuts for the fuselage mount. Here is the finished struts on the aeroplane. The wing is now incredibly stiff with the CF rigid struts and CF spar! Good for pulling 12 Gs!
So after all this work was it worth it? It’s like a whole new aeroplane! The stock SC wing must flex a lot in flight because now with my really rigid wing the aircraft is much more responsive and handles gusty conditions much better. Aerobatics are a joy as I have no worry that I’m going to pull the wing off! I have even managed inverted flight for almost 20 seconds. The CF struts are also a lot quieter than the flimsy SC stock plastic struts. I had thought of painting the new struts white to match the aeroplane but now I've grown to like the black CF look.
Flying at dusk with all my LED navigation lights on is really cool! I have not been bold/brave/daft enough to actually fly at night yet but the two bright landing lights and tail light really help while performing aerobatics in low light conditions to work out whether the airplane is flying towards or away from you. The blinking red LED on the vertical stabilizer is not really bright enough though and the narrow 20 degree viewing angle does not help. If anybody knows where I can get a brighter blinking red LED (3000 MCD or more) please let me know. I was testing all the LED lights on the kitchen table the other night when my wife walked in and looked at my SC all lit up and said “Boys with their toys!” I guess that kind of says it all.
Part 1 can be found here: supercubclub.proboards.com/index.cgi?board=tt&action=display&thread=2796
Part 2 can be found here: supercubclub.proboards.com/index.cgi?board=tt&action=display&thread=2793
It took me quite a while to figure out how I was going to fit rigid Carbon Fibre wing struts on my SCLP. In the end it turned out to be quite a fiddly job involving a lot of intricate metalwork. Not for the faint hearted this mod if you want to copy it!
I decided to use 3.2mm diameter carbon fibre rod for the struts. That was the easy part, working out how to fasten the rods to the wing and fuselage was the hard part! After a few experiments this is how I finally did it.
To mount the struts to the wing I made up some mounting plates with threaded inserts. I used # 6 “T nuts” from my local hardware store for the threaded inserts (The “brad” type T-nuts with holes and not the hammer home type with spikes). I epoxied these T-nuts into 35mm diameter plates made out of white gutter alluminium. After removing the stock strut mounts from the wing I epoxied the new threaded inserts into the wing.


As part of my previous battery box strengthening mod (See post : supercubclub.proboards.com/index.cgi?board=tt&action=display&thread=2699) I had installed #10 “rivnuts” on the fuselage for the struts to fasten to and I made a bracket out of 2mm alluminium sheet to fit on to these. I also made the lower strut mounts out the same alluminium and cut elongated holes for # 8 bolts in them for strut length adjustment.


Next I cut out of 2mm alluminium four plates to mount the struts to the wing. I made these plates 20mm diameter with a “tab” to fix the strut to. After I had finished these plates and bent the “tab” to the strut angle I epoxied a carbon fibre rod onto each one.


After drilling a hole for a #6 machine screw in the centre of each plate I screwed them to the wing, marked and cut the CF strut rods to length and epoxied them to the fuselage mounting plate. I did this with the wing installed on the aeroplane to get all the angles correct. (Another fiddly job this getting the dihedral angles and strut angles equal side to side) To tidy up the finished struts I placed heat shrink tubing over the epoxied strut to plate bonds.


I chose to use nylon machine screws and nuts to with shake proof washers to fasten the struts to the aircraft and wing as I wanted the bolts and screws to be the weakest link. My thinking here was that hopefully in the event of a major prang the nylon screws will break alleviating to much damage to the wing and fuselage. At least that’s the idea! For the wing mounts I used #6 nylon machine screws and #8 nylon machine screws and nuts for the fuselage mount. Here is the finished struts on the aeroplane. The wing is now incredibly stiff with the CF rigid struts and CF spar! Good for pulling 12 Gs!


So after all this work was it worth it? It’s like a whole new aeroplane! The stock SC wing must flex a lot in flight because now with my really rigid wing the aircraft is much more responsive and handles gusty conditions much better. Aerobatics are a joy as I have no worry that I’m going to pull the wing off! I have even managed inverted flight for almost 20 seconds. The CF struts are also a lot quieter than the flimsy SC stock plastic struts. I had thought of painting the new struts white to match the aeroplane but now I've grown to like the black CF look.
Flying at dusk with all my LED navigation lights on is really cool! I have not been bold/brave/daft enough to actually fly at night yet but the two bright landing lights and tail light really help while performing aerobatics in low light conditions to work out whether the airplane is flying towards or away from you. The blinking red LED on the vertical stabilizer is not really bright enough though and the narrow 20 degree viewing angle does not help. If anybody knows where I can get a brighter blinking red LED (3000 MCD or more) please let me know. I was testing all the LED lights on the kitchen table the other night when my wife walked in and looked at my SC all lit up and said “Boys with their toys!” I guess that kind of says it all.

