Post by Britpilot on Dec 26, 2009 6:13:31 GMT 1
I have just bought a couple of Hobby King’s Turnigy 1300 3s LIPO batteries. The stock PZ battery was already a tight fit in the battery compartment of my SC-LP and the Turnigys are a few mm longer and they would not fit in the battery box. I decided as I was going to have to modify the battery box to make a bit more room I might as well go ahead and carry out the BB strengthening mod as well.
I was going to use popsicle sticks as the others had done but decided to use some 1.1mm alluminium sheet instead as this would be stronger and hold self tapping screws better. Also I wanted to use some “rivnuts” threaded inserts for the strut mounting screws and it would be easier to install these in alluminium sheet than a fragile popsicle stick.
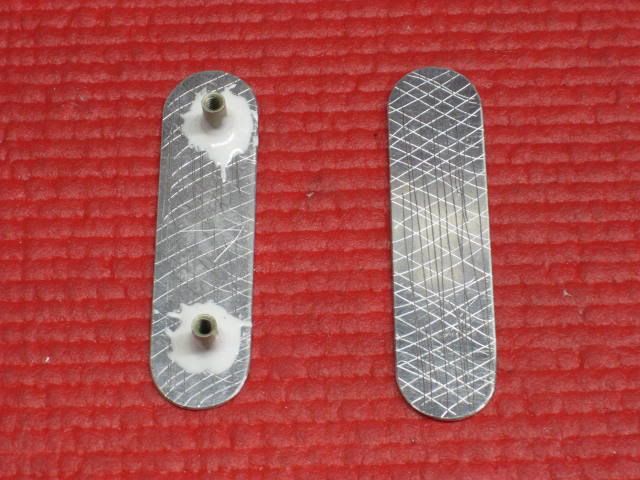
I cut two pieces of alloy sheet, 76 x 20mm for the front strengthening strip and 74 x 22mm for the rear. I used theses two strips as templates on the fuselage and removed foam with a soldering iron to allow the strips to sit flush with the fuselage bottom. I also removed some foam from the fuselage forward bulkhead for a little extra room for the longer battery. I marked the position of the strut screws on the rear strip and inserted two rivnuts.
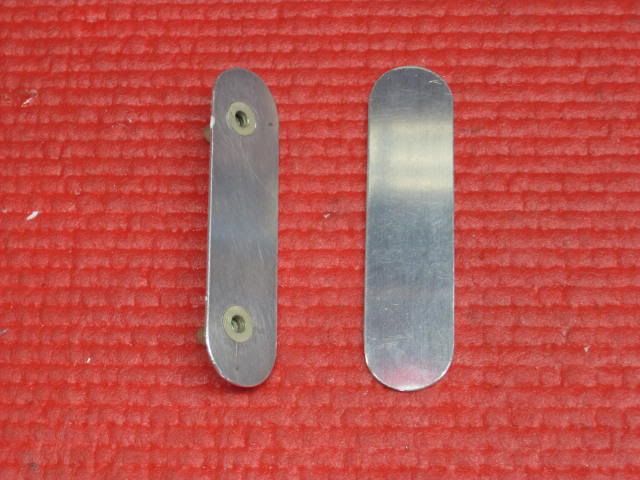
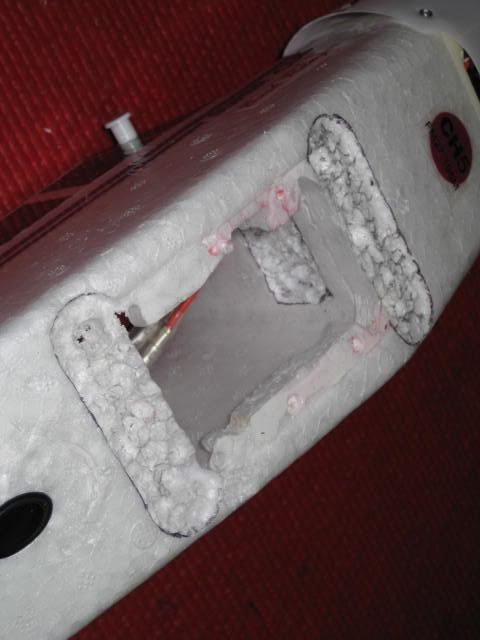
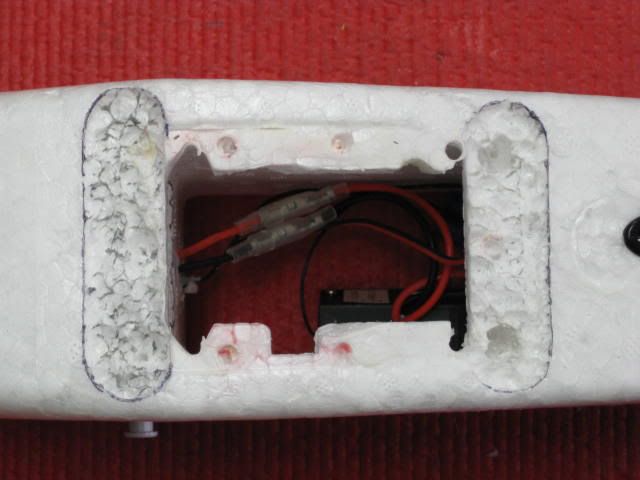
I scratched the back of the alloy strips to allow epoxy to adhere well and also added a little epoxy around the rivnuts to make sure they would never work loose. With a well greased screw in the rivnuts (to stop epoxy getting into the threads) I epoxied the two alloy strips in place.
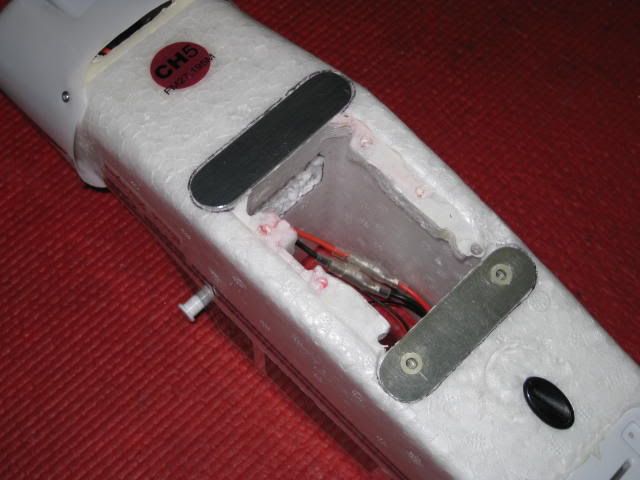
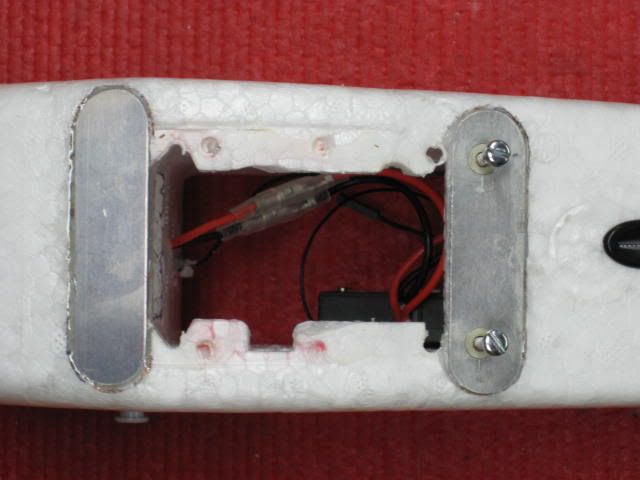
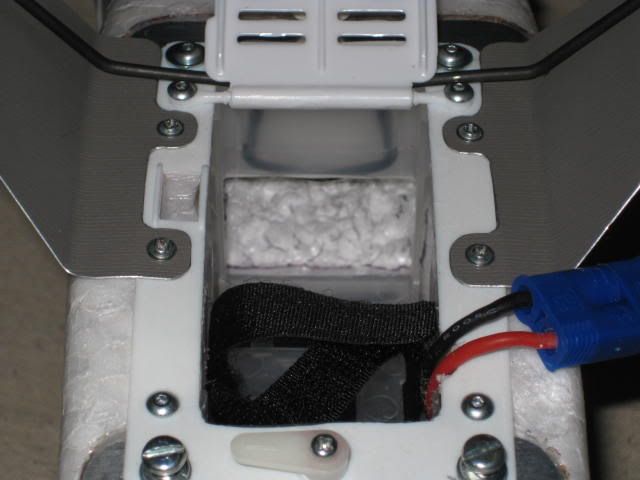
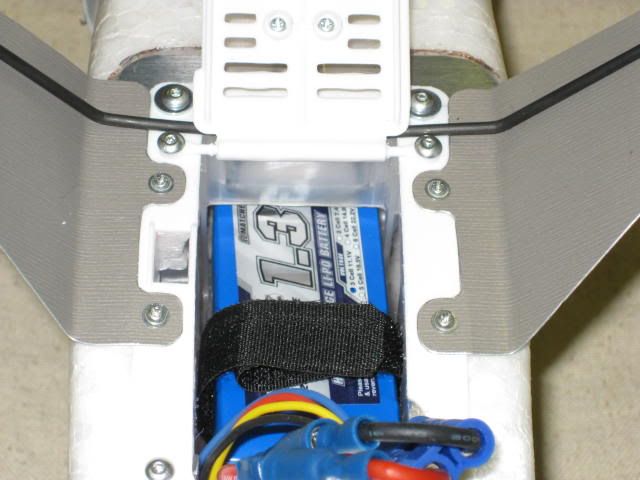
After cutting out part of the front of the stock BB cage make battery room I reassembled the battery box using three self tapping screws to fasten the BB to the forward alloy strip. This is what it looks like all back together with the struts now held by # 6 screws and not self tappers. It’s amazing how much firmer and sturdier the whole battery box assembly has now become.
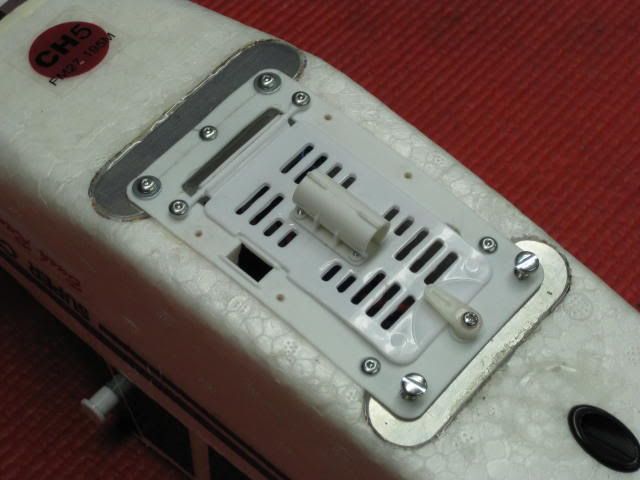
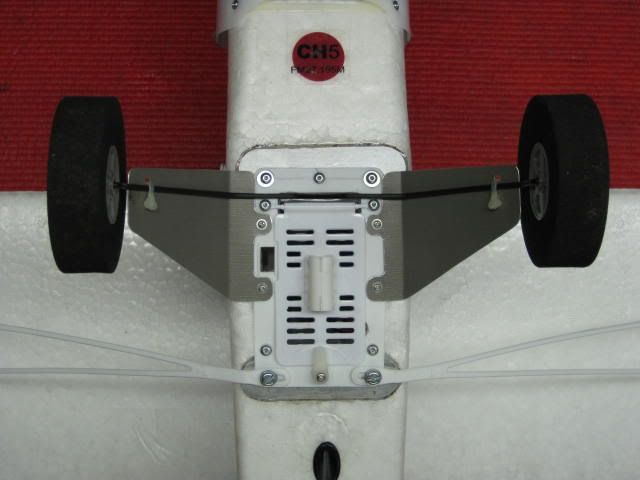
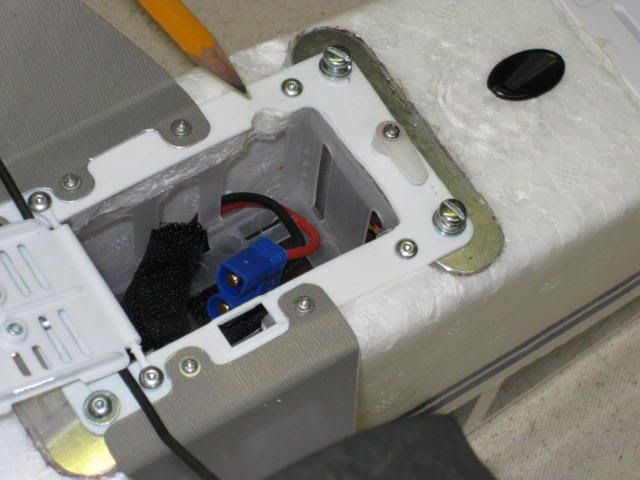
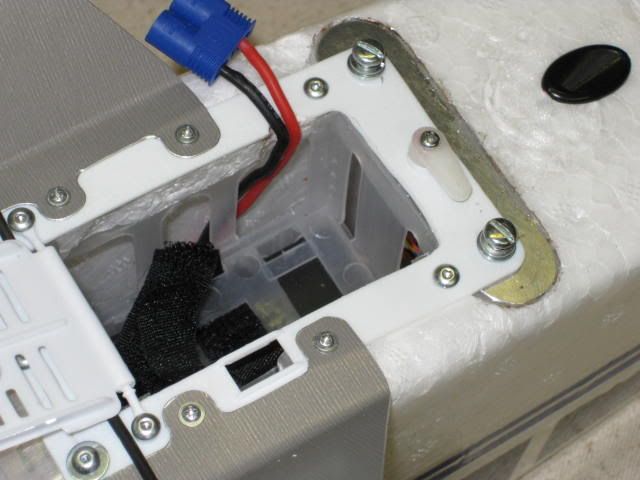
Here is a few more pictures showing where I cut out the battery cage to allow the longer LIPO to fit. Also note the small groove (shown by pencil) that I filed in the right side of the BB to allow the power leads to be out of the way when sliding the battery in.
Darn it PZ why did you make this thing so tight!
I was going to use popsicle sticks as the others had done but decided to use some 1.1mm alluminium sheet instead as this would be stronger and hold self tapping screws better. Also I wanted to use some “rivnuts” threaded inserts for the strut mounting screws and it would be easier to install these in alluminium sheet than a fragile popsicle stick.
I cut two pieces of alloy sheet, 76 x 20mm for the front strengthening strip and 74 x 22mm for the rear. I used theses two strips as templates on the fuselage and removed foam with a soldering iron to allow the strips to sit flush with the fuselage bottom. I also removed some foam from the fuselage forward bulkhead for a little extra room for the longer battery. I marked the position of the strut screws on the rear strip and inserted two rivnuts.


I scratched the back of the alloy strips to allow epoxy to adhere well and also added a little epoxy around the rivnuts to make sure they would never work loose. With a well greased screw in the rivnuts (to stop epoxy getting into the threads) I epoxied the two alloy strips in place.


After cutting out part of the front of the stock BB cage make battery room I reassembled the battery box using three self tapping screws to fasten the BB to the forward alloy strip. This is what it looks like all back together with the struts now held by # 6 screws and not self tappers. It’s amazing how much firmer and sturdier the whole battery box assembly has now become.


Here is a few more pictures showing where I cut out the battery cage to allow the longer LIPO to fit. Also note the small groove (shown by pencil) that I filed in the right side of the BB to allow the power leads to be out of the way when sliding the battery in.
Darn it PZ why did you make this thing so tight!


