|
|
Post by Dillzio on Aug 12, 2009 17:15:13 GMT 1
Hi all, I wanted to post pics of the cowl I made today, but couldn't find a thread dedicated to the topic, so I thought I'd make one. After only two flights the only thing holding the stock cowl together was the duct tape. 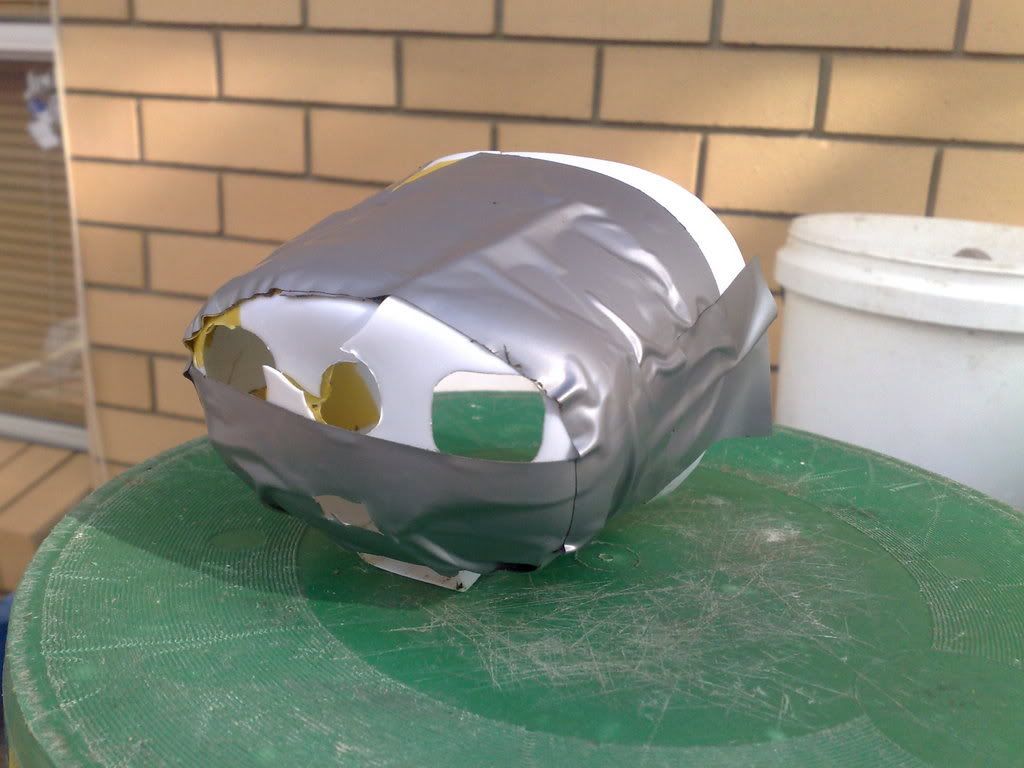 I trimmed the nose off a 750mL bottle of "pump" spring water, and cut the base off the bottle about half way up. Beware that the length has to be correct to the mm. Make it a bit too long at first so that the prop will rub, then gradually trim it down until it's just clearing the prop. I secured it in place with some electrical tape. 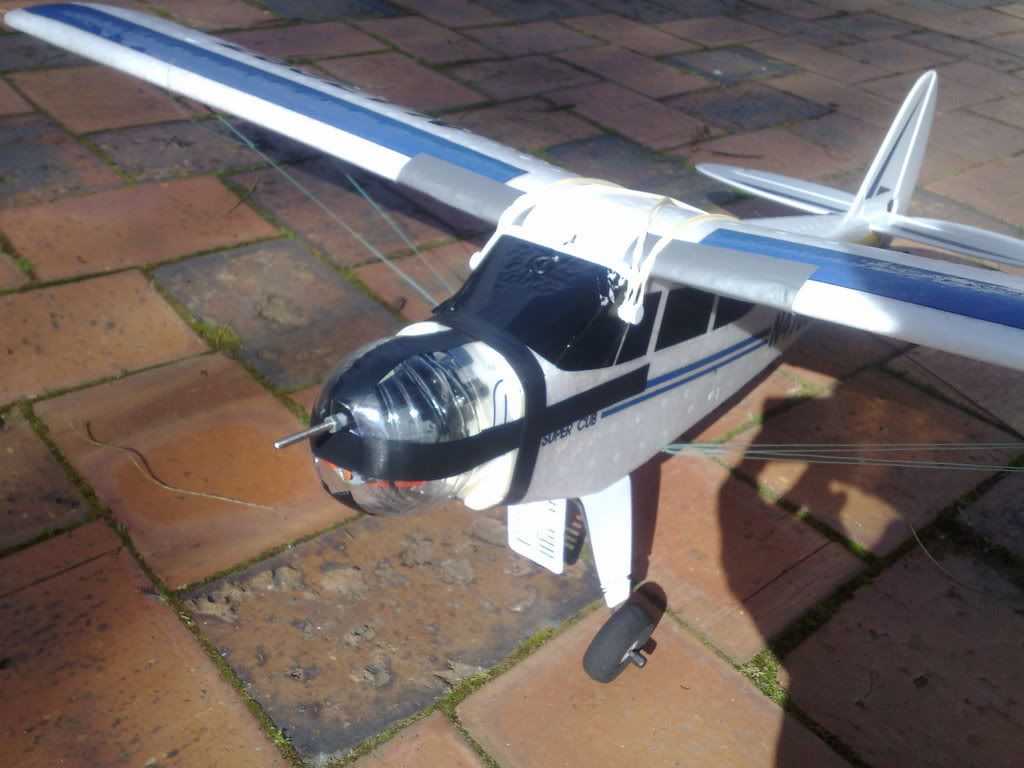 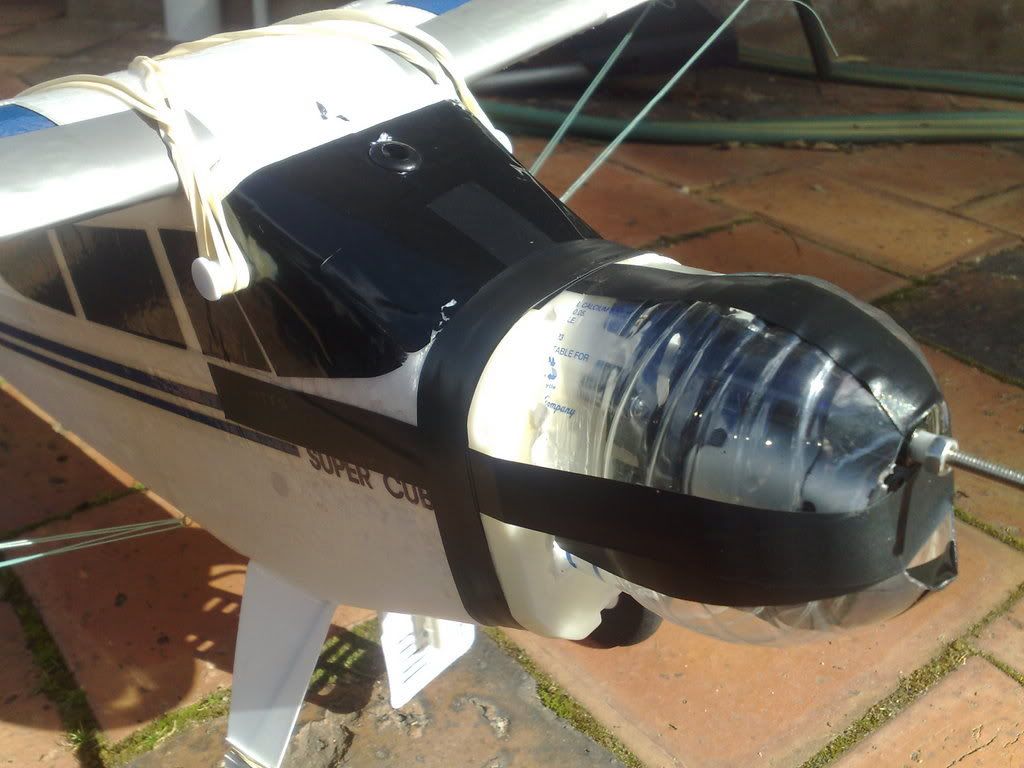 I then covered it in a couple of layers of duct tape to make it more aerodynamic, and to reinforce it. I also had to trim a bit more plastic off the front of the cowl, as it was rubbing against the prop after it buckled under the tension of the tape. Be sure to leave enough ventilation at the front. 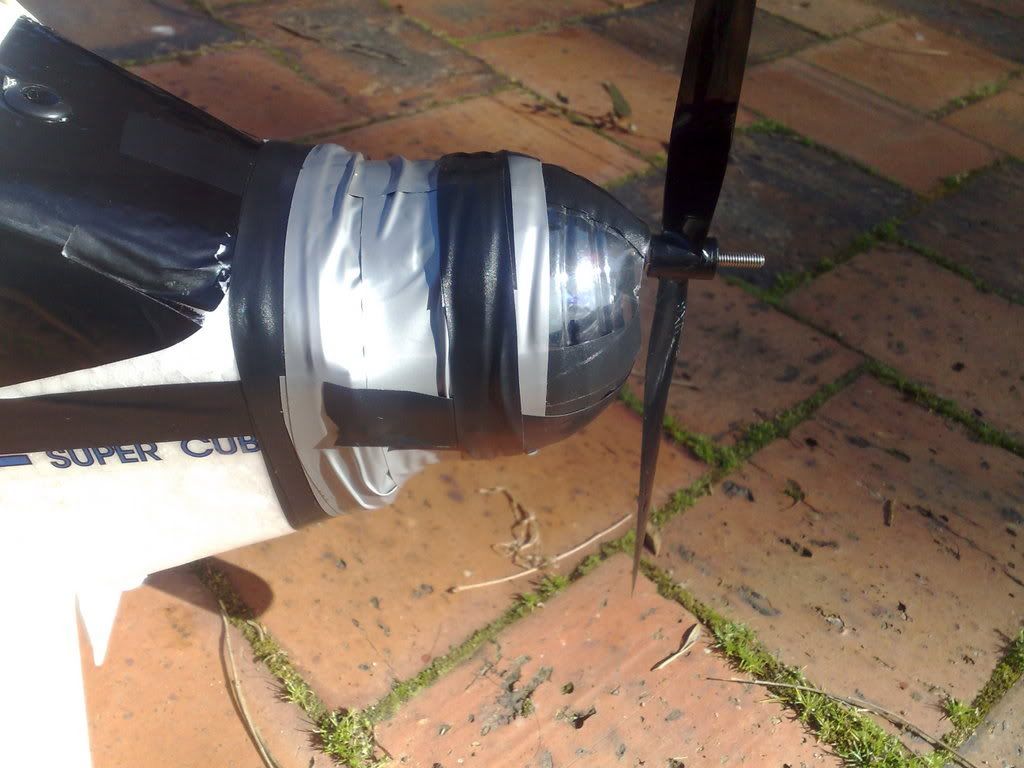 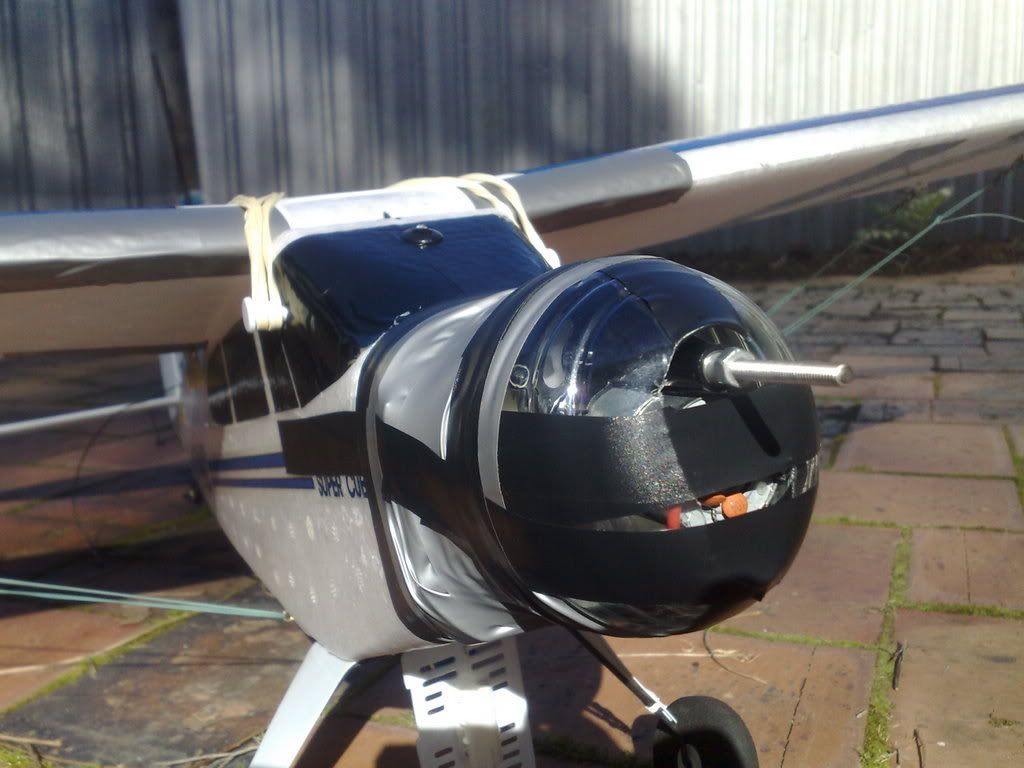 During my first attempt, I tried making a cowl out of a break fluid bottle, but it ended up a few mm too short so I couldn't use it. As I was tidying up, I realised that I could put the cowl I just made out of the break fluid bottle (which is TOUGH plastic) over the base I cut off the spring water bottle, and make another cowl that way. It needs to be trimmed a bit, but here's the pictures anyway. 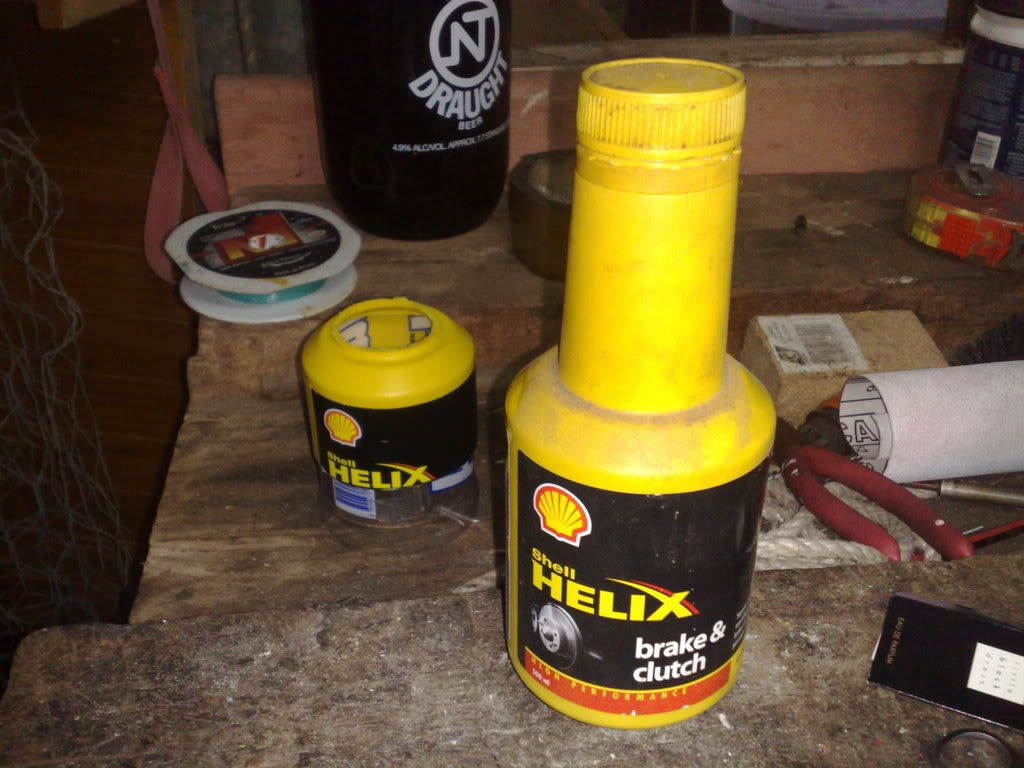 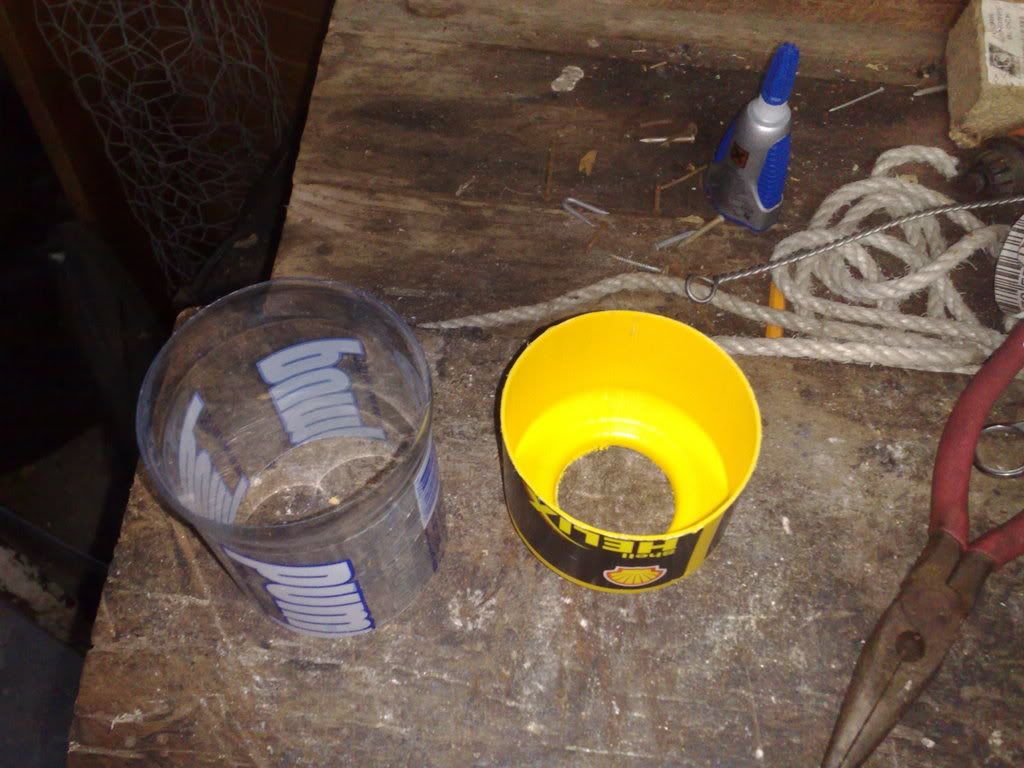 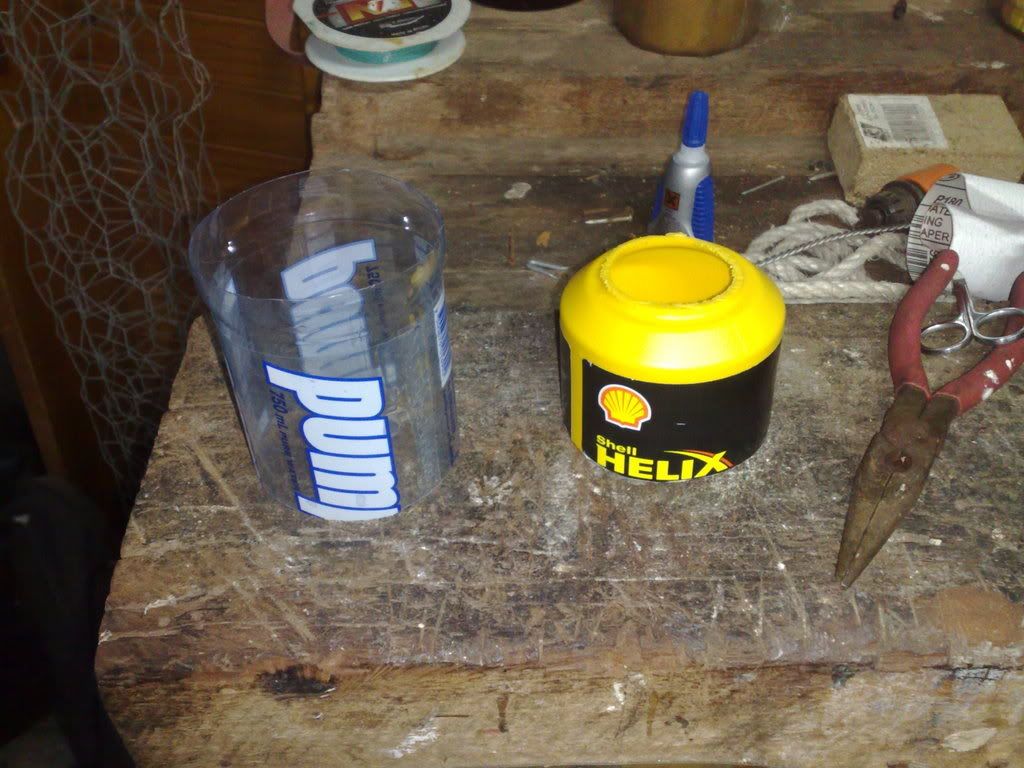 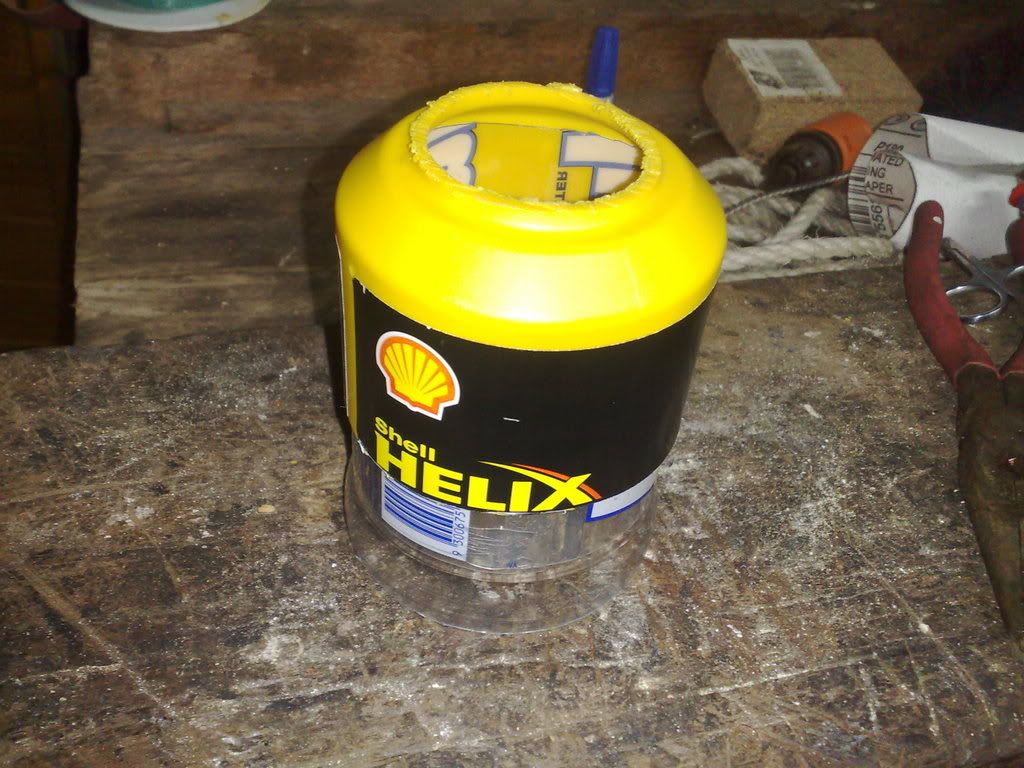 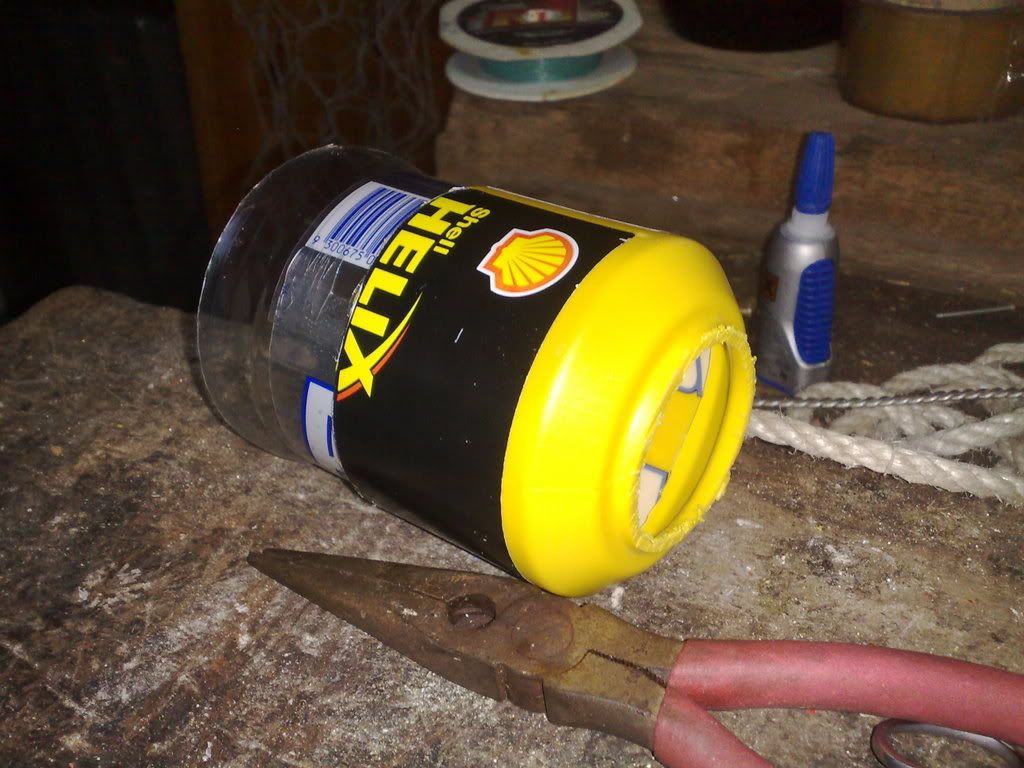 |
|
|
|
Post by Dillzio on Aug 13, 2009 5:56:46 GMT 1
I finished the other nose cone today, here are the pics. These are the two pieces that fit together to make it: 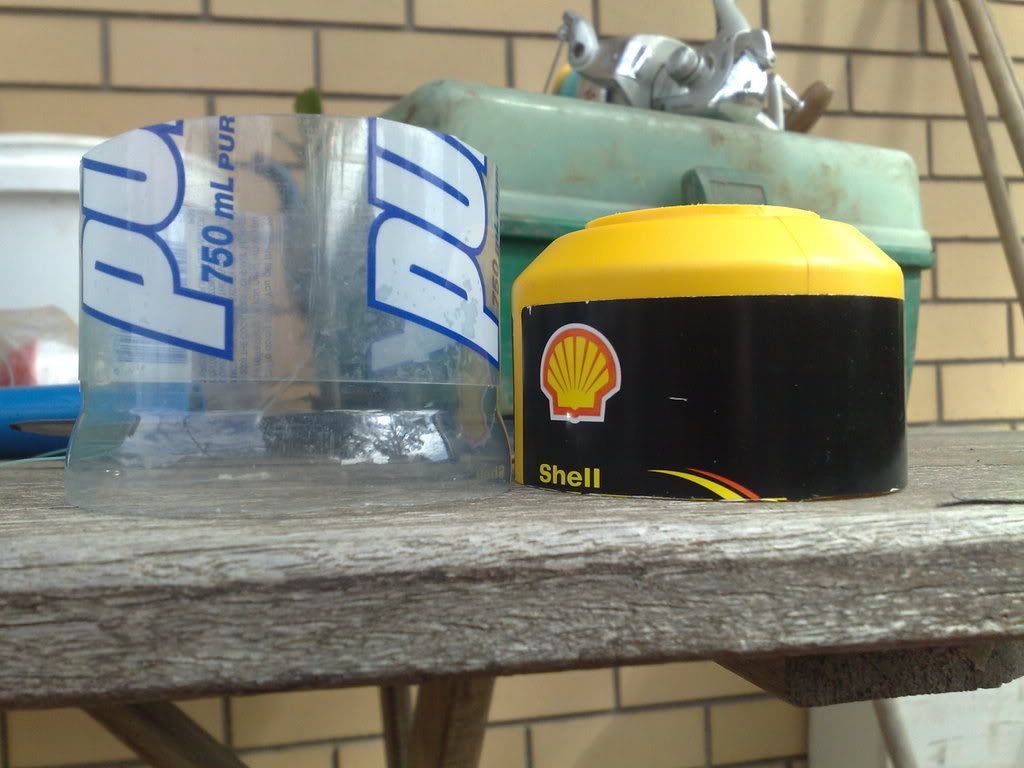 This is the finished product: (I know it's ugly but colored tape will follow) 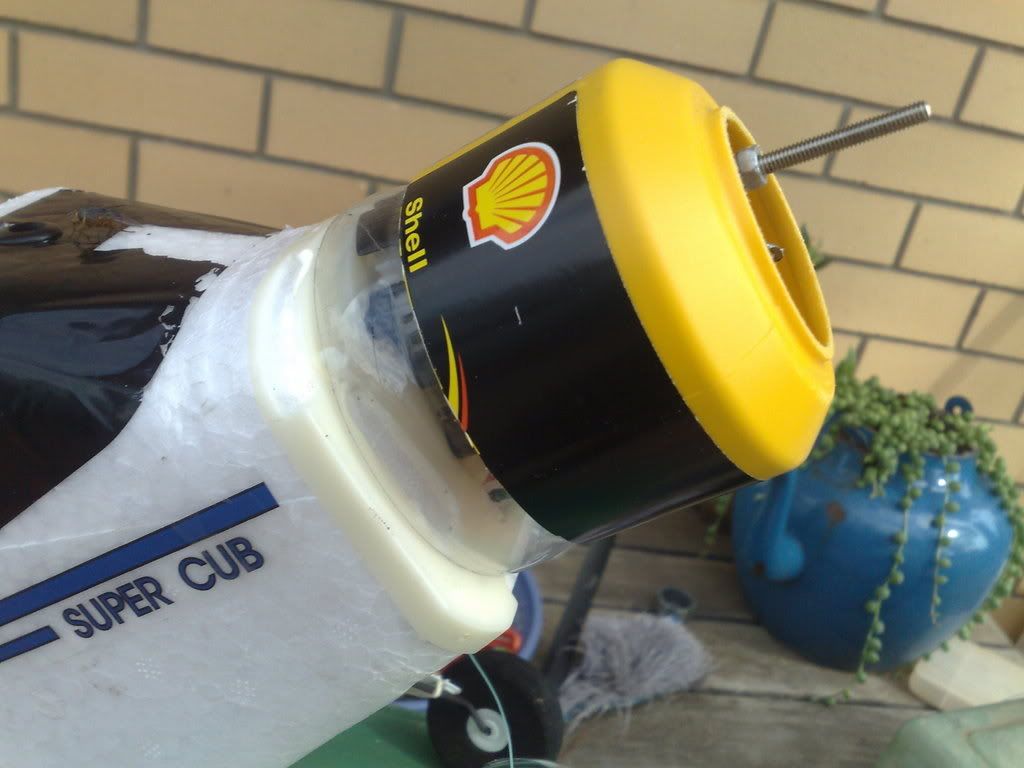 The clutch fluid bottle was much thicker and stronger, so I could file down the nose with some coarse sand paper and a sanding block to get the prop clearance just perfect. As I noticed, the prop shaft points down a bit, so the bottom of the cowl will rub on the prop unless you file it down until it's JUST past the motor. 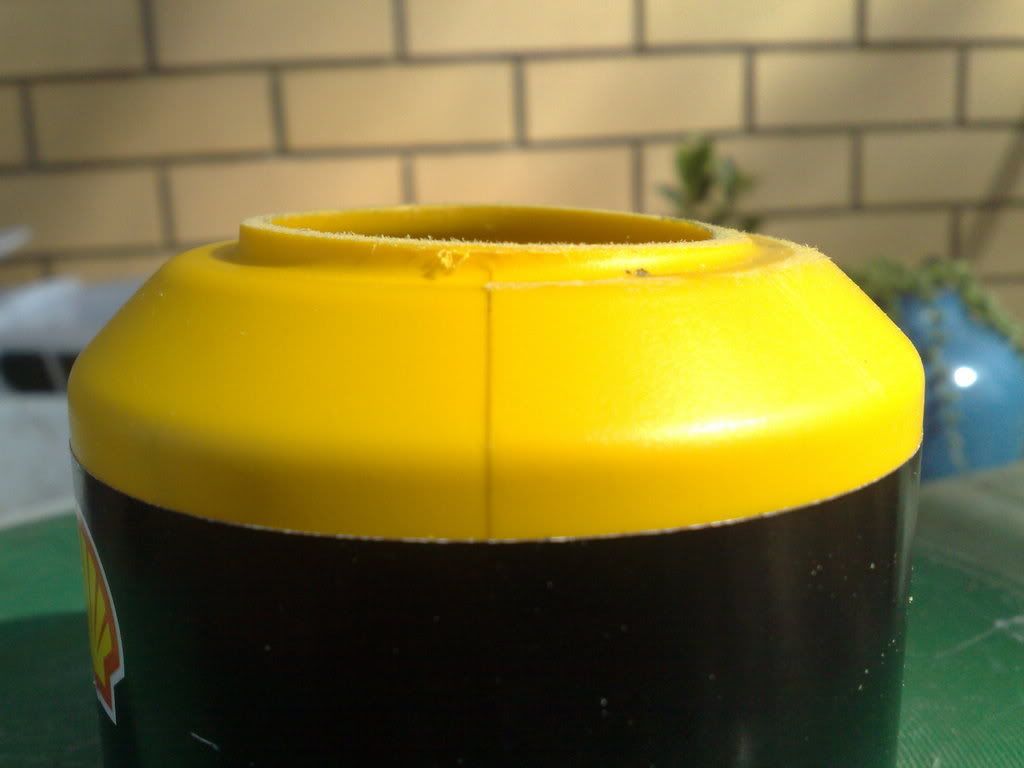 |
|
|
|
Post by cokebuck on Aug 26, 2009 4:23:44 GMT 1
Uhhhh......Ugly. You know a new cowl costs $2.99 ?
|
|
|
|
Post by Dillzio on Aug 26, 2009 5:34:10 GMT 1
Ugly? :-(
Actually, my cub isn't looking real pretty at the moment, tape and popsicle sticks all around the place. It does look tough though.
The stock cowls are extremely brittle, I just wanted to make something that can take a bit more damage before disintegrating, at least while I'm still learning.
After I get the hang of things I'll probably go back to the stock cowl.
Thanks for adding to my thread anyway, even if it was just to call my cub ugly. It was getting really lonely in here.
|
|
|
|
Post by killioughtta on Aug 27, 2009 2:18:08 GMT 1
Hehe. That IS an ugly cowl but don't take it so hard, there's better ways to go about your problem. You could just reinforce the stock cowl with clear packing tape on the outside AND inside and it can be very strong and take quite a bit of punishment.
You DON'T have to sacrifice looks for strength ;-)
|
|
|
|
Post by patmatgal on Aug 28, 2009 4:40:34 GMT 1
I just tape around the exterior of the cowl and spray about 8 light coats of Plasti Dip on the inside, spray wait 10 minutes, spray wait 10 minutes and so on. After it's done remove the tape, wipe off any overspray and let it cure for a day. Any weight gain is negligible and the cowl can take tons of abuse. The "paint" is lousy on foam, have to hold the can so far away to let the carrier evaporate before it hits the foam that only a small portion of the Plasti Dip reaches the foam (took 1/2 of an 11 oz rattle can to do the underside of the fuse) Here's a link to some: garage-toys.com/plspbl.htmlBut like cokebuck said, a new cowl is only $2.99 |
|
|
|
Post by Dillzio on Aug 28, 2009 6:40:27 GMT 1
Thanks for the tip pat :-)
Is that stuff similar to body deadner? the rubber paint stuff you can use to spray bare metal (usually on cars) to prevent it from rusting?
I think I have a tub laying around somewhere from when I sealed the inside of a subwoofer box.
|
|
|
|
Post by patmatgal on Aug 28, 2009 18:02:28 GMT 1
Don't know 100% but they do sound awfully similar. When Plasti Dip is sprayed on it leaves a real thin (the reason for so many coats) but even coat of rubber. Sounds like what you have will do the same. So if you got it just lying around with no real plans on using it, give it a try in the cowl, (or if you do have plans on using it maybe you could spare a little for the cowl  |
|
duck
Squadron leader
   R/C Addict
Posts: 219
|
Post by duck on Aug 31, 2009 15:57:58 GMT 1
I'm thinking that body deadener / undercoating spray will be pretty heavy. I was thinking of using thinned epoxy and lite polyester cloth inside, but on second thought, it would be brittle compared to Plasti Dip. The Plasti dip I've seen here is an actual dip, that we dip handles in to rubberise them. I've never seen it in a spray. I think even with the dip stuff, a guy could tape up the holes, and pour the dip in to the top and out quickly to keep the amount left in at a minimum.
|
|
born420
Flight lieutenant
 
Posts: 44
|
Post by born420 on Sept 1, 2009 18:38:52 GMT 1
hey that first pic of the destroyed cowl looks very nice lol jk but hey take all that old DUCT TAPE and dothe inside and out with packing tape the clear stuff thats what i did my cowl is just peices held togather by tape and it looks very nice
|
|
|
|
Post by Dillzio on Sept 2, 2009 14:12:07 GMT 1
Have done. Think it's at least 5 layers of clear packaging tape outside and in. Then I painted the outside.
I was thinking about the body deadner. I bet it would make an awesome coating for the OUTSIDE of the cowl. Maybe plastidip the inside for strength and cover the outside in the bitumin/rubber/tar stuff to add some padding? Then paint over it.
You could even add some matting to soak up the deadner and get a nice thick layer. Even use fiberglass matting! It's not as adsorbent as the proper matting you use for it (for waterproof sealing), but fiberglass would be much stronger!
I think reinforcing the stock cowl seems to be a better option than making another one all-together.
|
|
|
|
Post by patmatgal on Sept 2, 2009 14:21:41 GMT 1
duck
The dip can is what I prefer, you can brush that stuff on and it is FANTASTIC on the wing tips, wears like iron. I ordered the spray cans online from a place in PA but with the S&H and additional charge for aerosol cans, so not worth it...
|
|
|
|
Post by gagallagher04401 on Sept 3, 2009 2:18:19 GMT 1
Agree stock cowl is wicked brittle, does not take lon to destroy. What I have found is a take a new cowls and wrap completly in clear packing tape. It will look new and original, but be much stronger, and adds virtually no weight.
George
|
|
|
|
Post by Dillzio on Sept 3, 2009 6:50:15 GMT 1
Another cool idea  Cover the outside in fiberglass body filler bog. Maybe even put a layer of fiberglass matting and resin under that too. I might give that a go after I break my packaging tape cowl. I might even be able to use the original cowl as a mold to make as many fiberglass cowls as I want! |
|
duck
Squadron leader
   R/C Addict
Posts: 219
|
Post by duck on Sept 3, 2009 17:33:36 GMT 1
If you made a form from the outside surface of the new cowl, the inside of the mold would be nice and smooth, and cowls you make would be dimensionally the same as the original.
The fiberglass cowls would likely end up heavier.
The real trick would be to make a vacuum forming mold from the original, and vacuform them out of sheel.
|
|